Category

Cleaning

Category

A bedroom defines who you are besides your mental status. Not only is a bedroom beautiful to behold, but a clean and neat bedroom is necessary to help create a silent and restful atmosphere. Likely you cannot work in an untidy room you wish to clean. You get overwhelmed by the mess and the clutter.

Well, it’s time to say goodbye to mess and say hello to a refreshing, cleansed environment because you found yourself on our blog. This article compiles the definitive bedroom cleaning checklist, which includes a step-by-step guide on how to clean your bedroom and a proper schedule to keep everything tidy regularly.

Let’s get into action and transform that bedroom into a haven of serenity! Whether you’re aiming for a fresh, clean slate or considering new design elements like rich emerald room aesthetics, a tidy space is the foundation.

Why Bedroom Deep Cleaning Matters

A bedroom is where your body and mind recover daily. When it is unclean or cluttered, it directly impacts:

Why Bedroom Deep Cleaning Matters

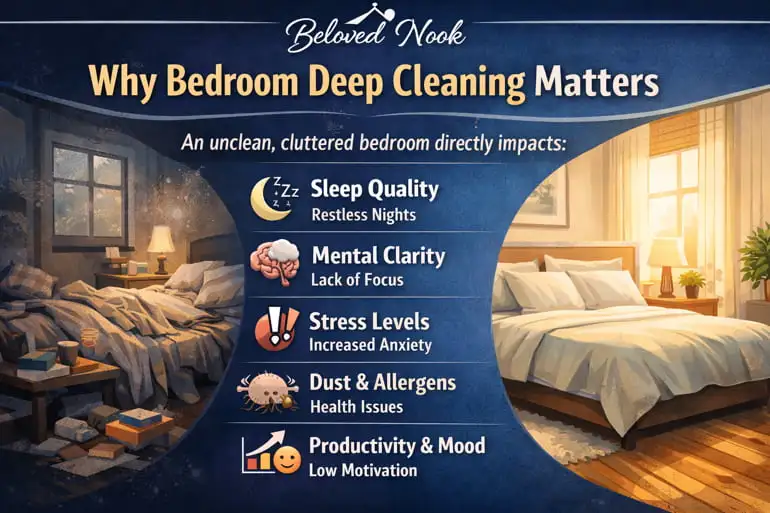
Regular cleaning is not just about appearance, it’s about health and lifestyle improvement.

Essential Items You’ll Need to Clean Your Bedroom

To clean your couple’s bedroom efficaciously, you should have the right tools and supplies to make the process quicker and more efficient.

When working through your bedroom cleaning checklist, be sure to stock up on the essentials for efficient cleaning.

  • Microfiber Cloths: Extremely fluffy and capable fabric that leaves no streaks or traces behind.
  • Vacuum Cleaner: As noisy as it can be, it’s an important appliance for deep cleaning your whole house, from carpets to rugs, and hard-to-reach nook and cranny.
  • Brooming/Mopping: Cleaning floors by sweeping away debris and then mopping on hardwood or tiled floors to keep them clean.
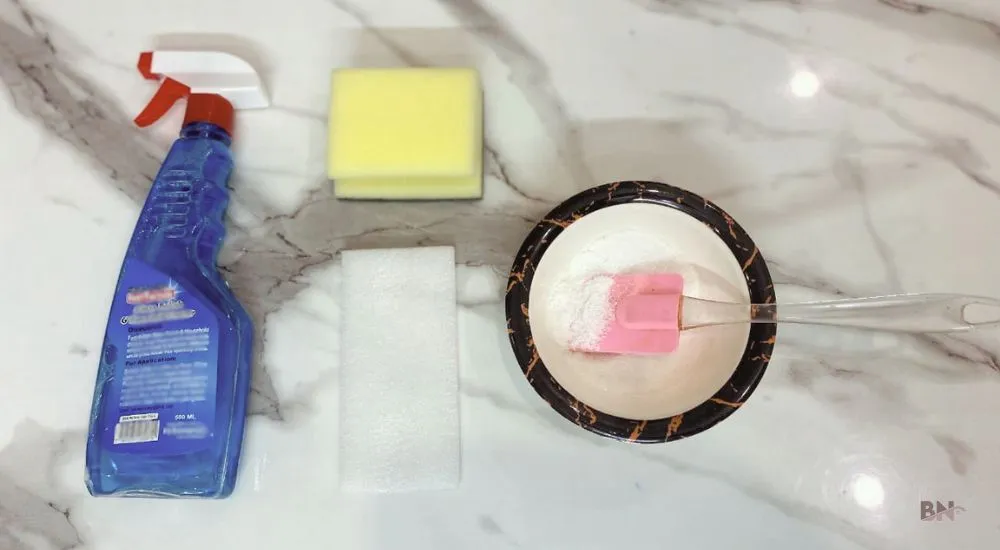
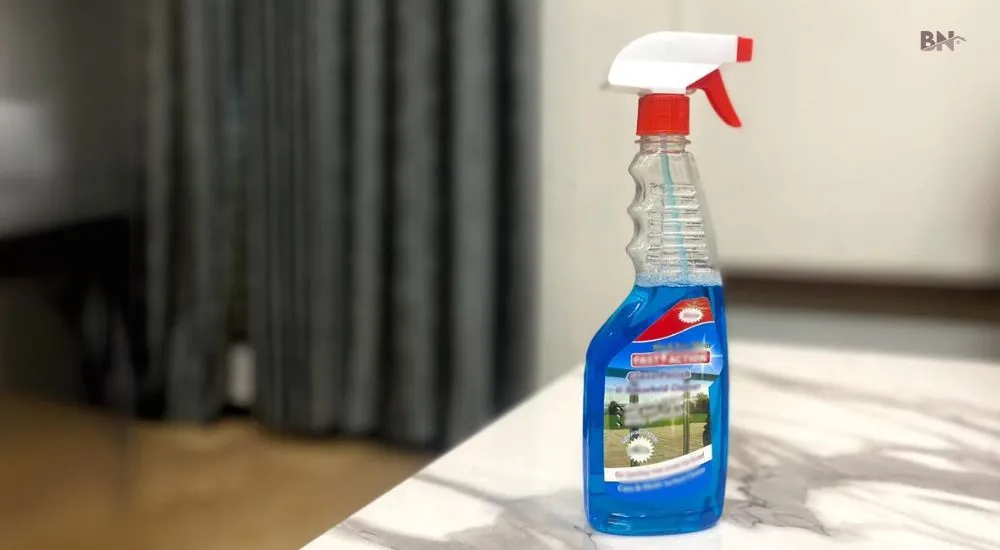
  • All-Purpose Cleaner: A cleaning solution utilized to wipe down various surfaces and can also be used to get rid of dirt, grime, or bacteria.
  • Trashbag: An easy way to gather and dispose of surplus waste materials to keep the surroundings tidy and organized.
  • Storage Bins: To organize random things that clutter the bedroom so that it stays within your reach but not disarrange your floor space or bed.

Create A Bedroom Cleaning Schedule

Bedroom Cleaning Checklist

Crafting out a bedroom cleaning checklist helps you in the further run to maintain a tidy and oragnized space without feeling overwhelmed on where to start when you finally realize that your room needs some cleaning.

So, a routine is the best way to keep the empty or fully designed nooks of your bedroom fresh and inviting with minimal effort.

Daily Bedroom Cleaning Checklist

  • Make Bed: Straighten your bedding first thing in the morning for a quick sense of tidiness.
  • Clear-up Clutter: Put away things like books, clothes, or personal belongings.
  • Empty Dustbin: Keep it odor-free by taking out the trash daily.
  • Quick Wipe: Using a microfiber cloth will clean high-touch surfaces such as nightstands and dressers by simply dusting.

Weekly Bedroom Cleaning Checklist

  • Change Bedding: Bed sheets, pillowcases, and duvet covers should be washed and changed for freshness.
  • Dusting/Mopping: It’s primarily dusting carpets and sweeping wooden floors of any dirt or debris.
  • Clean Surfaces: Clean all furniture, shelves, and light fixtures.
  • Mirrors and windows: Using glass cleaners, streak-free shine is achieved.
  • Declutter: Rearrange drawers and closets so everything is accessible and neat.

Monthly Bedroom Cleaning Checklist

  • Rinse the Curtains/Blinds: Pull dirt out of them and make them clean again.
  • Deep Cleaning Carpets/Rugs: Carpet cleaner is good or else you can have the carpets cleaned professionally.
  • Wipe Walls/Baseboards: Spray a cloth with water to wipe it and remove grime and scuff marks. If your room has textured walls, make sure to use the appropriate method to clean, not just water.
  • Clean Ceiling Fans and Vents: Prevent dust buildup from air blockage inside the house.

Pro Tips to Clean Your Bedroom

First Declutter: Collect all the items in one place. Toss out unnecessary items from every corner like sofas, matresses, carpets and your reading nook (if you have) while moving things to keep them in their respective areas. Perhaps it’s a great time to declutter your closet and check that off your winter cleaning list.

Dust and Vacuum: Be sure to start from the ceiling fans or shelves to avoid spreading the dust to recently cleaned surfaces, then vacuum the floors. Get all the dust so your bedroom is spotless.

Organize: Cleaned items must then be arranged in an orderly fashion so that everything is in its rightful place and the space is not disarranged. If your bedroom is also an office, you must organize everything in a proper way to optimize productivity.

Touch-Up: Fresh linens on the bed, and a light mist in the air of a subtle perfume, or even scent candles leaves the room so serene. In black and white bedroom, choosing linens that complement the monochromatic theme can elevate the serene vibe. This makes every touch-up feel transformative.

Benefits of Cleaning Your Bedroom

Ticking off every box from that bedroom cleaning checklist enhances your surroundings and improves your daily routine and habits in many different ways.

1. Improves Productivity and Focus

Messiness in any place generates a mental mess. An organized, polished bedroom removes many distractions and breeds clarity and efficiency, which allow you to work on your responsibilities.

By maintaining your environment with a bedroom cleaning checklist, you’re creating a productive mindset for your daily tasks.

2. Boosts Mentality

A pristine space breeds more positivity, ensuring you feel most at peace or motivated. The messiness harbors different levels of stress or anxiety.

Therefore, cleaning up not only relaxes your mind but also gives you the feeling of control and accomplishment, changing the mood of the room instantly.

3. Encourages Healthy Habits

Cleaning your bedroom encourages healthy habits like discipline and making a routine to keep not only your room tidy but your home clean from top to bottom.

This practice gives a sense of initiative and the mentality to maintain all areas of life and motivates you to improve your life and surroundings.

Who knows, one day you wake up and feel inspired to make changes in your room, like changing the flooring, moving the bed to another location, or installing board and batten walls in your bedroom, there are endless possibilities.

For example, if you’re considering decorating a peaceful gray bedroom, a deep clean can be the perfect starting point to refresh the space.

Conclusion

You can follow the bedroom cleaning checklist while maintaining freshness through daily decluttering, dusting, and organizing.

This everyday habit will maintain a clean space, help to create a cozy environment conducive to good sleeping habits, and assist in restful sleep.

By performing everyday activities or even taking a more deep-cleaning approach monthly, you can keep a neat room that enhances your physical space while positively affecting your mental state.

Get to cleaning today, and transform your bedroom into a cozy haven for ultimate relaxation.

Deep cleaning a house can sound like a huge task, but with the right tools and a plan, it becomes surprisingly manageable (and even satisfying!).

Here’s your room-by-room deep cleaning house checklist to make sure every corner of your home gets the love it deserves.

Ready to roll up your sleeves?

Let’s get started.

Quick Project Snapshot | Deep Cleaning Checklist

Must-Have Deep Cleaning Supplies

First, gather the right tools and products to make this as smooth as possible:

  • Vacuum Cleaner: Ideally one with attachments to reach tricky areas and different surfaces.
  • Microfiber Cloths: Great for dusting without leaving streaks or marks.
  • Mop, Scrubbing Brushes, and Sponges: For getting floors and surfaces spotless.
  • Disinfectants and Surface Cleaners: Choose products suitable for the kitchen, bathroom, and other areas.
  • Glass Cleaner, Floor Cleaner, Degreaser: For stubborn spots like mirrors, greasy stovetops, and tile floors.

Pro Tip: When using stronger cleaners, ventilate the area, and if you have pets or kids, keep them out of the room to avoid any exposure.

Room-by-Room Deep Cleaning Guide

Now, let’s dive into each room with focused, step-by-step tips to make deep cleaning not just effective but efficient. By following these targeted guidelines, you’ll be sure to cover all the essential areas without missing any details.

This approach ensures you tackle each space with a clear plan, so you’re not just moving dirt around but truly getting every room to a fresh, like-new state.

Whether it’s the often-forgotten spots under appliances in the kitchen, the grout lines in the bathroom, or dust that hides in bedroom corners, each task here is designed to save you time and maximize results.

How to Deep Clean the Kitchen

The kitchen often sees the most traffic, so it’s worth the extra time to deep clean.

  • Wipe down appliances: Start with small ones like the microwave, then clean the refrigerator, oven, and stovetop thoroughly. For extra guidance, see how to clean your house from top to bottom.
  • Clean under appliances: Pull out larger items like the fridge (if you can) to vacuum and mop underneath.
  • Disinfect countertops and sink: Use a food-safe disinfectant, especially around areas that collect crumbs and spills.
  • Organize and clean cabinets: Get rid of expired items, wipe down shelves, and reorganize for easy access, or even plan a cozy kitchen nook if you find extra space.
  • Degrease surfaces: Use a degreaser on range hoods, kitchens’ backsplash, and stovetop areas where grease loves to stick.

How to Deep Clean a Bathroom

How to Deep Clean a Bathroom

Bathrooms need extra attention due to moisture and regular use, but a few key steps make them sparkle.

  • Scrub grout and tiles: Use a tile cleaner and scrub brush to remove any soap scum or mildew from shower tiles. Damp areas like bathrooms and poolside spaces tend to attract mold, so regular cleaning helps. Make sure to clean poolside pavers if you’re dealing with buildup outdoors too.
  • Disinfect toilets, sinks, and tubs: These get a lot of use, so use a bathroom-specific cleaner on each surface.
  • Polish mirrors and glass surfaces: A glass cleaner will help eliminate streaks and water spots.
  • Organize cabinets and drawers: Clear out expired items and clean shelves.
  • Wipe down walls and floors: For stubborn spots, here’s a guide on how to clean white walls.

Extra Tip: For help cleaning walls, see our guides on how to remove stains from walls.

How to Deep Clean a Bedroom

How to Deep Clean a Bedroom

Bedrooms should be cozy and dust-free, For those aiming for a serene monochromatic bedroom vibe, a thorough cleaning can enhance that minimalist aesthetic by keeping surfaces clutter-free and pristine.

  • Launder bedding: Wash sheets, pillowcases, and even pillows if they’re machine washable.
  • Dust all surfaces: Use a microfiber cloth on furniture, including headboards, nightstands, and shelves.
  • Vacuum and rotate the mattress: A quick vacuum helps remove allergens, and rotating helps with wear.
  • Clean light fixtures and fans: Dust ceiling fans and any light fixtures.
  • Organize closets and drawers: Donate items you no longer need, and reorganize everything for a tidy look.

Living Room Cleaning Checklist

Living Room Cleaning Checklist

The living room gets plenty of use, so a deep clean here makes a big difference.

  • Dust and vacuum furniture: Clean under cushions, wipe down upholstery, and vacuum fabric surfaces.
  • Wipe down electronics: Use a microfiber cloth to clean screens and remove fingerprints from remotes.
  • Clean floors: Sweep, mop, or vacuum, depending on the type of flooring. If you have wood, use specific methods to remove stains from hardwood floors without damaging the finish.
  • Wash windows and blinds: A glass cleaner on windows and a damp cloth on blinds does wonders.
  • Tidy and organize shelves: Dust surfaces and declutter anything that’s overstayed its welcome.

Weekly Cleaning Schedule

To keep your home feeling fresh between deep cleans, a simple weekly cleaning schedule is invaluable.

Weekly Cleaning Schedule

Here’s a routine you can easily keep up with:

  • Monday: Dust and wipe down surfaces in the living room and bedrooms.
  • Tuesday: Mop the kitchen floor and disinfect countertops.
  • Wednesday: Clean the bathrooms, focusing on sinks and toilets.
  • Thursday: Dust ceiling fans, light fixtures, and electronics.
  • Friday: Vacuum or mop floors in every room.

This routine helps keep your home looking fresh and welcoming all week long, making each deep cleaning session quicker and easier to manage. By taking just a few minutes each day to tackle specific tasks, you’ll prevent messes from piling up and stay on top of the usual dust, dirt, and clutter that naturally collect in a busy home.

With these steps, you’ve got a complete guide to deep cleaning without the overwhelm. By gathering the right tools, focusing on each room individually, and maintaining a simple weekly schedule, you’ll not only have a spotless home but also more time to enjoy it!

Conclusion

This checklist takes the guesswork out of deep cleaning, so you can feel proud of every room in your house—sparkling, organized, and ready for whatever life throws your way.

The right furniture polish will not only make your wood look shiny and new, but it will also help fight off dust, fingerprints, and those annoying little water rings that keep popping up.

As we know, over time, sunlight, dirt, and daily use can dull even your favorite wood pieces; a good polish works like a mini spa treatment for your furniture, like new, while giving your living room a chic look.. It will bring the glow back. It will also protect the wood.

7 Wood Polishes to Revive Old Furniture

Whether you are tackling an antique dresser, your dining table, or even a leather accent chair, the right product makes all the difference. We are sharing 7 best wood furniture polishes to make your vintage furnitureinto new.

1. Howard Feed-N-Wax Wood Polish and Conditioner

Howard Feed-N-Wax Wood Polish and Conditioner

Price: Around $9 (16 oz)
Best for: Restoring moisture to dry wood.

Howard Feed-N-Wax is a fan favorite among people who want something that’s easy and quick to use when it comes to dry wood. It’s a combination of beeswax and orange oil (yes, your furniture will smell heavenly) that will highlight the natural grain while also creating a protective coating.

The Good Stuff:

  • Revitalizes dull wood surfaces.
  • Works wonders on antique furniture.
  • Great for those who enjoy the feel of DIY furniture polish, but want a store-bought shortcut.

The Not-So-Good Stuff:

  • If you’re heavy-handed, it might leave an oily residue. Just wipe properly, and you’re good!

Pro Tip: If you’re wondering how to clean antique wood, this polish can breathe new life into those vintage treasures. Perfect for old, dried-out furniture that needs a glow-up.

2. Scott’s Liquid Gold Wood Care

Scott’s Liquid Gold Wood Care

Price: Around $6 (10 oz)
Best for: Easy application and a streak-free finish.

For a wood furniture cleaner that is easy to use and shows high efficacy, Scott’s Liquid Gold represents the best choice. This product not only serves the purpose of cleaning but also imparts a protective gloss.

The Good Stuff:

  • Cleans and polishes in one go.
  • Works with wood that is both finished and unfinished.
  • Smells amazing and leaves no greasy aftermath.

The Not-So-Good Stuff:

  • Avoid using it on laminates or painted finishes – it’s picky.

Pro Tip: Pair this with a soft cloth for a streak-free shine that’ll leave everyone asking, “What’s your secret?” This would give the impression that you had it cleaned by a professional tbh.

3. Weiman Furniture Wipes

Weiman Furniture Wipes

Price: Around $5 (30 wipes)
Best for: Quick touch-ups and convenience (or when you’re too lazy to find a cloth).

The furniture cleaning wipes are suitable for those seeking a convenient way to maintain wooden furniture cleanliness. These wipes have been enriched with lemon-scented oil for cleaning, polishing, and protecting.

The Good Stuff:

  • Super convenient for daily dusting.
  • Lemon-scented, UV-protecting, and perfect for a quick dust-and-shine.
  • Adds a protective layer against dirt (like a screen protector).

The Not-So-Good Stuff:

  • The wipes may dry out if they are not properly sealed.

Pro Tip: If you’re looking for the best dusting spray in a wipe format, this is it! Perfect for busy households.

4. Pledge Polish and Shine Multi-Purpose Spray

Pledge Polish and Shine Multi-Purpose Spray

Price: Around $5 (9.7 oz)
Best for: Multi-surface cleaning.

Pledge has been around in the house for decades, and for a very good reason. It’s a furniture polish spray that can work on wood, glass, even granite, and so many other surfaces.

The Good Stuff:

  • Removes sticky residue with ease.
  • Leaves no waxy buildup.

The Not-So-Good Stuff:

  • Contains silicones, which some people would rather stay away from.

Pro Tip: Wondering how to remove sticky residue from wood, give it a glow in one step. This spray will save the day and leave your furniture smelling fresh. Pledge is your new BFF.

5. Behold Furniture Polish

Behold Furniture Polish

Price: Around $4 (12.5 oz)
Best for: Budget-friendly shine.

Behold is the best furniture spray cleaner in town for it will really do the trick without denting your pocket. It cleans, polishes, and leaves your furniture smelling citrusy fresh.

The Good Stuff:

  • Excellent for everyday cleaning and dusting.
  • Provides a glossy, smudge-free finish.

The Not-So-Good Stuff:

  • May cause buildup over time if overused.

Pro Tip: Perfect for quick cleaning sessions. If you’re looking for the best dusting spray at a budget price, Behold has you covered while giving your furniture a spa day.

6. Sprayway Furniture Polish

Sprayway Furniture Polish

Price: Around $4 (19 oz)

Best for: Fingerprint-proof finishes.

This would use a blend of silicones, lemon oil, and cleaners for that fresh-off-the-store look at your wood furniture as well as its sparkle. It’s great for smudges, and fingerprints, too.

The Good Stuff:

  • Easy to use with a spray and then wipe method.
  • Leaves a dust-resistant protective coating.

The Not-So-Good Stuff:

  • Some people may find the lemon aroma overpowering.

Pro Tip: Use this polish on the best wood furniture you touch a lot—think coffee tables and desks. Sprayway will give them a professional-grade finish. No more sticky fingerprints!

7. Nuvera Wood Furniture Polish and Cleaner

Nuvera Wood Furniture Polish and Cleaner

Price: Around $7 (18 oz)
Best for: Deep cleaning and restoration in one step.

Nuvera is a powerhouse when it comes to tackling dirt, grease, and dull wax buildup, leaving the wood looking fresh. This wood furniture cleaner brings out the natural beauty of your wood with ease.

The Good Stuff:

  • Easy spray-and-wipe application.
  • Works well on antique and modern wood furniture.

The Not-So-Good Stuff:

  • Availability might be hit-or-miss, depending on your location.

Pro Tip: If your antique wood furniture is looking a bit sad, Nuvera is a great pick. It’s like a makeover for your furniture!

Can These Polishes Be Used for Wood Walls?

Most of the furniture polishes mentioned in the article can also be used to clean wood walls and floors. Always clean the surface first, test a small area, and apply sparingly. Avoid painted or textured walls. Weiman Furniture Wipes or Pledge Polish is often more manageable, especially for vertical surfaces.

Final Thoughts: Choosing the Best Furniture Polish

Whether you’re trying to clean wood furniture, remove sticky residue, or simply keep your furniture looking its best, there’s a polish for you. For the ultimate shine, try Howard Feed-N-Wax. Need a quick fix? Weiman Wipes are perfect. Want versatility? Pledge Polish has your back. Time to grab your favorite polish and make your furniture sparkle!

The living room is the heart of the house. Whether you want to have an uninterrupted rest after a long day at work, entertain some friends, or binge-watch the latest Netflix series, the living room is the place to be. With so much use, the living room is susceptible to generating dust and clutter. The WebMD names it the third germiest place in a house after the bathroom and kitchen. This is mainly because of the upholstery, which is a breeding ground for allergens and bacteria. The fabrics are exposed to unwashed hands, sneezes, and dirt from shoes and feet. Therefore, in your house cleaning checklist, living room should be on top priority. That’s where this article comes in.

Living Room Cleaning Tools

The first step is assembling your weapons of warfare. Remember, this isn’t a 10-minute-quickie where you speed clean because your parents are coming over. The goal is to get tools that will allow you to clean nooks and crannies with ease. Most of these tools are also effective for tasks like kitchen deep cleaning.

Below are the must-have tools:

  • Vacuum cleaner (preferably with attachments for different surfaces)
  • Window cleaner (you can DIY it)
  • Microfiber mop and bucket for hard floors
  • All-purpose cleaner
  • Scrub brushes and duster
  • Carpet cleaner or extractor
  • Gloves
  • Baking soda in a shaker
  • Wood cleaner/conditioner
  • Microfiber cloths (both multipurpose and glass-only)

Where to Start your Cleaning up Living Room

1. Gather Trash And Declutter The Living Room

Before you start deep cleaning, you should first declutter the room and remove trash. Decluttering is a great idea if you have energetic kids who tend to toss things everywhere or if a wild party leaves your room in disarray. Start by removing toys, video games, papers and clothes, utensils, clothes, books, and anything else that doesn’t belong in the living room. You should also collect all the trash.

This includes leftover foods you didn’t put in the fridge, unopened mail, and wrappers. Get rid of items you rarely use that take up space in your room. If you can’t gift them or find a use for them, tossing them out is better.

2. Dust The Living Room

This is where you bring your microfiber cloths into action. But be prepared to turn your living room upside down. You’ll have to remove all the books from the shelves, book jackets, wall decorations like pictures, and even the household ornaments and artwork scattered across the living room. Dust them thoroughly using the microfiber cloth or duster.

For electronics and devices, use a different cloth and wipe gently in one direction to avoid streak marks. Make the electronic cleaner using an isopropyl alcohol (IPA) solution. The solvent dissolves light oils, fingerprints, and flux residues, notorious in home electronics. Remember the air vents and window blinds. These areas gather dust quickly, so it’s wise to include them on your living room cleaning checklist.

3. Deep Clean Sofas (And Other Seats)

This is the step you bring in the vacuum cleaner with an upholstery attachment. You also need a cleaning solution of your choice. Just be sure to avoid using strong chemicals if you have pets or toddlers, as they could be affected. Start by vacuuming the sofas thoroughly. Place the upholstery under cushions and crevices to remove crumbs, pet hair, and dust.

Mix a cup of warm water with white vinegar in a spray can to remove hard stains. Gently dab the stain with a cloth, starting from the edges and moving inwards to prevent it from spreading. You’ll note odors from the chemicals used in the process. Baking soda works perfectly to get rid of the smell. Sprinkle it over the sofa and let it rest for half an hour before vacuuming it.

4. Re-arrange Your Sofas, Electronic Equipment And Coffee Table

Remember the last time you visited your friend and thought they bought new stuff, only to find they’ve changed the living room layout by moving it around? You can do the same while deep cleaning your living room. As you clean the nooks and crannies where you’ve placed your equipment, coffee tables, and sofas, this is an opportunity to change the layout of your living room.

You’ll not only clear dust from those tricky spots but also have the chance to reimagine your living room layout. Just ensure the new setup keeps the space accessible for cleaning and organizing in the future. Moving heavy furniture often reveals hidden scuffs or older spills; if you notice any discoloration on your flooring during this process, knowing how to remove dark stains from wood floor surfaces can save you from a costly refinishing job later.

Many homeowners find that a cleaner, more organized space is the perfect canvas to experiment with new color palletes, such as: relaxing and calm vibes you may try creamy, light pink or olive green, dark and moody colors for energetic or design it in farmhouse style, which relies on a clutter-free and functional layout to truly shine.

5. Clean The Walls

The walls are the most forgotten places when deep cleaning the living room. They quickly pick up dust and stains, especially if you have toddlers with sticky “Spider-Man” hands. The cleaning approach is the same whether cleaning a white or expensive wooden wall. Start by taking down any artwork or pictures from the walls. If there are cobwebs, use a broom to sweep them away. An extendable duster can help you reach those high corners with ease. Once done, the next step involves using a microfiber cloth or sponge. Soak them in warm water and gently rub the walls.

Use a product like a magic eraser to clean tough stains from the wall. They work well, removing tough stains without compromising the wall paint. Cleaning walls in the living room can also be applied to other rooms in the house. Whether it’s bathroom deep cleaning to tackle stubborn mildew or kitchen deep cleaning to remove grease stains, a consistent approach keeps every room spotless.

Read Also: How to Eliminate Bathroom Quickly

Conclusion

Deep cleaning of the living room is a tiring process. But you don’t have to wait till it looks like a dumpsite before you take action. It’s recommended that you take a “little but often” approach. This can be a daily 10-minute cleaning of the “seen areas.” You can also advise your household members to be wary anytime they’re in the living room. They can wipe spills as soon as they occur and ensure the place is always tidy. But as I said earlier, a 10-minute quickie can’t keep the living room spotless for long. Dedicate at least one day per week where you go all in with a thorough, deep clean.

Cleaning pavers around the pool is not only about sanitation. More importantly, it’s about the aesthetics and value of your house. A lack of thorough cleaning will result in discoloration, dullness, and cracking on the pavers’ surfaces. This will ruin all your efforts in selecting attractive paver ideas and laying the pavers. Make your pool unappealing and also reduce the market value of your house. Several reports have shown that swimming pools with maintained paver areas increase the price of the house by 15 to 25%. So, if you want to maintain the value and the aesthetics of your home, all you have to do is clean and maintain your paver area.

10 Tips To Clean The Pavers Around Your Pool Properly

Here’s a detailed list of steps that will guide you on the best way to clean pavers around the pool.

1. Get The Required Supplies

Before starting paver cleansing, ensure that you have all the supplies you require during the procedure. This step will allow you to proceed with all the other cleaning steps smoothly, so let’s have a look at all of these required essentials:

  • Detergent
  • Garden hose
  • Bucket
  • Broom
  • Scrub Brush
  • Dry mop
  • Sealant

2. Clear The Area

Remove all the obstacles, including furniture, decor items, and any other thing that can offer hindrance to the cleaning process. The dispersion of the random items around the pool will distract you during the washing of the pavers and drain all of your energy. Therefore, it’s always a good idea to start your cleansing with this preparatory step as it allows you to go smoothly with the next steps.

3. Remove The Dirt and Debris

Get a broom and sweep all the loose dirt and debris off the paver area. Ensure that you have cleared all the debris and dust particles, including leaf residues and used wrappers. This step will also help you prevent the spread of dust and dirt in the washing step. Furthermore, if you find a stain-producing substance present in the area, clean it before you apply water.

4. Prepare The Detergent

Select the detergent that suits perfectly according to the type of paver. You’ll find the different detergents for concrete, brick, and stone pavers. It’ll be the best idea if you choose biodegradable or eco-friendly detergents. If you’re looking to clean pavers naturally, try using vinegar, baking soda, and some of the essential oils. These natural agents can also be used for removing the molds from the pavers. Furthermore, don’t try to use the pool coping cleaner on the paver surfaces. After getting an efficient detergent, dilute it in water. Must keep the manufacturer’s instructions in mind when diluting the detergent.

5. Wash and Scrub

Rinse the pavers before applying the detergent. Follow a uniform pattern when you apply the diluted detergent on the paver surface. Then, use a scrub brush to remove the stains and dirt from the area, along with the detergent. If you find some tough stains, prefer using concentrated detergent. Besides, try to scrub the tough stains more forcefully to get a completely cleaned area. Just remember that your efficient cleansing skills in combination with a compatible detergent will give you the satisfying results enough to make your day.

6. Rinse Thoroughly

Once you’re done with the treatment of stains and dirt with detergent solution, wash the area thoroughly with sufficient water. For thorough rinsing, it is always the best option to use a garden hose. Otherwise, you can use a large capacity bucket for washing purposes, but it can prove tiresome for you. Regardless of which option you choose, use enough water to completely remove the detergent and dirt particles.

7. Recheck The Area

Let the pavers dry and recheck the entire area. Find out if there are any dirt or stain remnants. In most cases, oil stains become difficult to remove. They become nearly invisible during washing, but can be clearly identified once the surface becomes dry. So, if you find any kind of spots making your pavers unappealing, apply the detergent again, wait for a few minutes, and wash thoroughly.

8. Apply The Sealant

The next step is to apply the protective sealant. It will prevent the pavers from any more stains and damage. Select the compatible sealant. You can go with the acrylic or epoxy sealants, depending on their protective abilities and resulting appearance. Clean the area thoroughly and then wait for the paver area to dry before applying sealant. Now, apply it by using a brush, roller, or sprayer. Let it dry for a sufficient time, as mentioned by the manufacturers.

9. Maintain The Pavers

After the thorough cleansing, try to maintain the pavers by avoiding tough stains and permanent damage. Keep seasonal cleansing in mind. In addition to this, consider the overall appearance of your yard; knowing how to get a green lawn can significantly enhance the beauty of your clean pavers. Develop the habit of inspecting the damaged area regularly. If you find any deterioration, repair it immediately. Similarly, take immediate steps for cleaning if you accidentally make stains on the pavers. All of these precautions will maintain the paver’s integrity and its attractive appearance.

10. Use a Pressure Washer for Deep Cleaning

For a quicker and more efficient clean, consider using a pressure washer on your pavers. The high-pressure water stream can remove stubborn dirt, mold, algae, and stains that scrubbing might miss. Just make sure to use the correct nozzle and maintain a safe distance to avoid damaging the paver surface. Pressure washing once or twice a year can keep your poolside looking fresh with minimal effort.

Final Thoughts

You need to maintain the attraction and integrity of the pavers around the pool by ensuring their thorough cleansing after a specific period. Prefer using eco-friendly detergents or natural compounds to remove the coagulated dirt and tough stains. Once you’re done with cleansing, apply sealant on the pavers and maintain with care and precautions.

If you have accidentally spilled anything on your hardwood floor that left a stain, it’s a problem that requires immediate action. You must act quickly, otherwise it will be difficult to clean the floor without causing damage.

Most people don’t realize that hardwood floors have a porous surface even when polished. If stains are not removed promptly, they will settle in and make your floor look unattractive.

But there’s no need to worry; common household stains can be treated with homemade remedies without using harsh chemicals. For this reason, we have prepared this extensive guide on how to get stains out of hardwood floors.

Basic Supplies to Remove Stains from Hardwood Floors

There are a few basic supplies that you will need to remove stains from a wood floor.

It includes:

  • Vinegar and water solution
  • Baking soda paste
  • Hydrogen peroxide
  • Clean microfiber cloths
  • Soft-bristle brush
  • Mineral spirits (optional, for tough grease)
  • Detergents
  • Dust Mop
  • Lemon Juice

Although the above-mentioned supplies are available at home, it is recommended that you perform a small-scale test of each of the supplies before applying them to a larger surface. This will ensure good results.

Certain important steps are needed to remove different types of stains. So, in the process of removing the stain, you must know the type of stain you want to remove. The most common types of stains and how to clean them are discussed below.

1. How to Remove Pet Stains From Wood Floors

How to Remove Pet Stains From Wood Floors

People with pets are well aware of this kind of stain. Pet stains on the wooden floor happen due to the chemical reaction of urine and bodily waste. Enzymatic cleaners are considered the most effective solution for pet stains.

However, to temporarily eliminate the smell, you can use baking soda or vinegar. Baking soda is also of use if you want to deep clean your kitchen.

How to Use:

  • Vinegar Solution: First, fill a spray bottle with equal parts vinegar and water, then apply the mixture to the affected area. After applying, wait for the results.
  • Baking Soda: For this, you have to sprinkle the baking soda over the stained area and let it sit for at least 10 minutes. Baking soda is also useful in removing stains from walls.

2. Ink and Dye Stains (Rubbing Alcohol or Hydrogen Peroxide)

 Ink and Dye Stains

Wood’s porosity is one of the main causes of ink and dye stains. It happens because the liquid penetrates the porous surface and leaves a mark. However, if you are wondering how to remove stains from a wood floor caused by ink and dye, we have a solution. Rubbing alcohol or Hydrogen peroxide can help treat ink and dye stains.

How to Use:

  • Rubbing Alcohol: It is quite easy to apply rubbing alcohol, you just need a soaked cloth with rubbing alcohol and gently dab on the stain. It is preferred over the ink stains.
  • Hydrogen Peroxide: Like rubbing alcohol, hydrogen peroxide is likewise very simple to use. The hydrogen peroxide-soaked cloth should be applied immediately to the discoloration.

3. Grease and Oil Stains (Dish Soap or Mineral Spirits)

Grease and Oil Stains cleaning in wooden floor

When grease or oil is spilled onto a wooden floor, it leaves this kind of stain. These substances are made up of lipids and are insoluble in water, and penetrate the surface. However, you can take steps to remove stains from wood imparted by grease and oil. Dish soap and mineral spirits are commonly used to remove stains from wood floors.

How to Use

  • Dish Soap: The application of dish soap is easy; rub it on the affected area and let it sit for a few minutes.
  • Mineral Spirits: Mineral spirits, on the other hand, are recommended for the stubborn stains. Its application process is to the point. Blot the stain with a small amount of mineral spirits.

4. How to Remove Water Stains from Wood Floors

How to Remove Water Stains from Wood Floors

Water stains are caused by the penetration of moisture into the porous surface. To remove water rings from the floor, you can use a dry iron or light sanding.

How to Use

  • Dry Iron: Set your iron on the lowest heat and slowly move back and forth over the surface with gentle pressure.
  • Light Sanding: You can use a fine-grit sandpaper and apply it to the wood floor in a circular motion.

5. How to Get Dark Stains Out of Wood Floor

How to Get Dark Stains Out of Wood Floor

This type of stain can occur due to water damage and sun exposure. So, to remove stain from a wood floor, use hydrogen peroxide directly on the stain and wait for 30 minutes. Next, use a gentle towel to dab at the area.

How to Use:

  • Hydrogen Peroxide: You can spray undiluted hydrogen peroxide directly on the stained area.

Wooden Floor Maintenance Tips

If you are reading this, then you must be a person who has either faced this problem or wants to avoid it in the future. So here are some maintenance tips that can help prevent your floor from future staining.

  • Use rugs in high-traffic areas
  • Clean spills immediately
  • Avoid excess moisture during mopping
  • Use furniture pads
  • Clean the floor monthly
  • Vacuum the floor Weekly

Keep in mind that regular care is a must to avoid future issues. When cleaning your house from top to bottom, you must clean your hardwood floor.

Final Thoughts | How to Remove Stains From Hardwood Floors

Although hardwood floors are sustainable, they can become stained over time if not properly cared for. The above tips on how to get stains out of hardwood floors can save you money. The methods discussed in the article and the steps to remove stains from wood are effective and can increase your floor’s life.

Wood walls bring the aesthetic of the outside nature into your house with a modern touch. However, as time passes, you’ll notice dust accumulation on the surfaces. Or if your kids are always hyper, they might accidentally spill something on the walls or, even worse, use them as a canvas for their crayon art. You want to prolong the lifespan of the wood walls (doesn’t matter whether these are half wood or full), so you shouldn’t leave them any time you’re deep cleaning your home.

Tips to Clean your Wooden Walls

Most homeowners wait until their walls are filled with dust before they have an intensive cleaning session. Save yourself the hassle by regularly maintaining your wood walls instead. You can opt for weekly or biweekly dusting of the wood panels using a dry cloth or feather duster. By sticking to this routine, you’ll keep your walls consistently spotless, and when it’s time for a deep cleaning session, the process will be far less stressful.

Additionally, if you are sensitive to conditions like sinus problems, be sure to wear a face mask to prevent dust from affecting you during cleaning. This guide will give you critical insights on how to clean wood panel walls. Let’s start with the basics.

Use Basic Cleaning Solutions For Wood Walls

Want to avoid chemical footprints on your walls? Simple household items can do the trick. Not only is this a more eco-friendly approach, but it’s also budget-friendly, keeping your wooden walls looking clean without taking a big chunk out of your house cleaning budget. The approach involves using household items like water and vinegar. Mix accurate amounts of each liquid in a spray bottle. Spray the solution onto your wooden walls and wipe with a clean, dry cloth. You can also use lemon juice and olive oil. Mix them in equal measures and follow the same procedure as instructed above.

Both methods are simple yet offer long-lasting results. A solution of water and vinegar effectively removes grime without bringing harmful chemicals into your home. On the other hand, lemon juice and olive oil create a natural blend that not only cleans but also conditions the wood, leaving it refreshed and well-maintained.

Don’t Over-Wet Your Wood Panels

When using water to remove stains from wood walls, there are a few things to keep in mind.

  • Better Dirt Removal: Warm water is better at removing wood specks of dirt like grease and grime. Plus, it removes residues quicker so you don’t need to scrub the wooden panels harder which might damage the wood.
  • Faster Drying: Warm water evaporates faster than cold water, minimizing the exposure time of the wood to moisture. This reduces the risk of the wood absorbing excess water, which could otherwise lead to swelling.
  • Gentle on Wood Finish: Cold water causes thermal shock or contraction on wood. Warm water doesn’t have these effects on the wood hence avoiding damage.

Another thing to note is over wetting the wood panels. The effect will be the same even if you’re using warm water for the cleaning. While water is a good cleaning resource, use it sparingly. Excessive usage easily damages wood. Instead of soaking the cloth, dampen it and squeeze it to remove excess water before wiping the wood walls.

Tackling Tough Stains On Wooden Walls

Cleaning wooden walls is simple when you’re only removing dust that has accumulated over time. But if you’re asking how to clean nooks and crannies or you’re dealing with tough stains like marker/ink stains, grease, oil, or crayon marks, you have to try tougher methods.

Here are some tips for removing stains from walls, especially if you want to clean white-colored wood walls.

  • Marker or Ink Stains: Cleaning ink stains is a bit complex. Start by applying rubbing alcohol on a soft cloth. Rub the spot gently to avoid spreading the ink wide. Once done, wipe the area with a clean, damp cloth and finally dry the spot.
  • Grease and Oil: The trick is to clean it as soon as possible before it dries. Sprinkle baking soda on the stain while it’s still wet which will absorb the grease. Next, wipe the spot using a clean damp cloth thoroughly until all the stains disappear.
  • Crayon Marks: If you have creative kids at home, crayon marks on the walls are a common issue. But don’t worry, the fix is simple: use a hair dryer. Set it to low heat to prevent any burn marks on the wood, and aim it directly at the crayon stains. The heat will soften the wax, making it easy to wipe away with a paper towel.

Conclusion

The durability of your wooden walls depends on how regularly you clean them. You don’t have to keep it complicated. Use the tips we’ve shared with you to keep that natural touch of your house intact.

Textured walls look gorgeous there’s no denying that. The downside? They pick up dust, grime, and mystery stains faster than any smooth wall ever could. And if you’ve ever tried wiping them down with a regular sponge, you probably figured out that it doesn’t really work. The good news is that cleaning textured walls isn’t as complicated as it seems. Whether you have a knockdown, popcorn, or stipple finish, here are five easy and paint-safe methods that actually work (no harsh chemicals or fancy tools required).

Let’s dive in and get those walls looking fresh again!

5 Effective and Safe Ways to Clean Popcorn Wall

1. Dust-Off Like a Pro (Microfiber Vibes)

Remove Stains Like a Pro

Before you even think about breaking out the cleaning supplies you use for deep cleaning, hit your walls with a dust-off session. Grab a microfiber cloth or an extendable duster, or hit it with your vacuum’s brush attachment (soft brush) for max efficiency and get to work!

The Move:

  • Work in an up-and-down motion to catch the sneaky dirt hiding in the crevices.
  • Focus on those corners and edges – they’re like the dust VIP section.

This method is ideal for heavily textured walls, such as popcorn ceilings or walls with deep indentations. Make sure the suction is set to low or medium setting to avoid any potential damage.

2. Give It a Soapy Sponge Glow-Up

Give It a Soapy Sponge Glow-Up

Time to give your walls a little TLC. Little spa treatment! A simple mix of warm water and a few drops of mild dish soap can work magic on textured walls without ruining your paint.

How to Slay It:

  • Mix that warm water and soap. Keep it light, bestie.
  • Dip a soft sponge in, and wring it out (no drips allowed).
  • Gently wipe the walls in small circles—no need to go beast mode.

For best results, avoid using harsh chemicals, as they can strip away the paint and cause discoloration. This method works especially well for areas that see frequent use, such as living rooms and hallways.

Pro Tip: It’s always better to test in a hidden spot first. Use gentle, circular motions to avoid pushing water deep into the texture. We’re not here for surprises.

3. Baking Soda: The Real MVP for Stains,

Baking Soda: The Real MVP for Stains

Textured walls love stains. They are notorious for hiding stains. But don’t stress—baking soda is basically the GOAT. It’s cheap, natural, and tough on gunk without messing up your paint. Stubborn stains, whether on textured walls or others, can be tricky.

The Game Plan:

  1. Mix baking soda and water to create a thick paste (think toothpaste vibes).
  2. Slather it onto the stain with a cloth or sponge.
  3. Let it sit for like 5-10 minutes—this is its time to shine.
  4. Wipe it with a damp cloth. Stain? Gone. Boom!

4. Magic Erasers = Your Wall’s Bestie

Magic Erasers = Your Wall’s Bestie

No cap, magic erasers are basically sorcery. Whoever invented magic erasers deserves an award. These magic erasers work well in eliminating common stains such as fingerprints, crayon marks. or scuff marks. They’re PERFECT for textured walls covered in scuffs, grime, or those random mystery marks you can’t explain.

Here’s the Deal:

  • Squeeze out any excess water after wetting the magic eraser.
  • Gently scrub the textured area. Go easy—you’re cleaning, not lifting weights. You really don’t need to Hulk-smash it.

Pro Tip: Don’t overdo it or scrub way too hard. Paint isn’t invincible, okay?

5. Vinegar Spray = Low-Key Genius

clean textured ceilings

Vinegar isn’t just for salad dressings, Chinese cuisine, or TikTok cleaning hacks—it’s the real deal because it cuts through grease and grime without wrecking your paint job. It works wonders and is also eco-friendly!

How to Use It:

  • In a spray bottle, combine equal parts warm water and white vinegar.
  • Lightly spritz the wall—keyword: lightly. Don’t soak it.
  • Use a sponge or gentle cloth to clean it. Done and dusted.

Common Mistakes to Avoid When Cleaning Textured Walls

  • Using too much water: Soaking the wall can cause paint to bubble or loosen the texture. Dampen, don’t drench.
  • Scrubbing with abrasive tools: Steel wool or rough sponges might remove the grime, but they can also remove the paint.
  • Skipping the dusting step: Going straight to wet cleaning pushes dust deeper into the textures and creates a muddy mess.
  • Not testing a small area first: Always patch-test your cleaner in a hidden spot to make sure it doesn’t discolor the paint.

How to Maintain Textured Walls?

Staying on top of cleaning makes it a breeze! Regular maintenance can keep textured walls looking pristine without heavy scrubbing. Use a reminder every few weeks to do a quick dust-off or clean small stains as soon as you notice them. The more consistent you are, the easier it is to maintain that fresh, clean look.

Comparing Textured Walls, White walls and Wooden walls

Textured walls? Dust magnets that need gentle love. White walls? Total drama queens—show every stain but clean up easy. Wooden walls? Low-key chill but needs wood-safe TLC and a little polish to keep shining. Each wall’s got its vibe, but with the right care, they’ll all stay looking fab! Plus, while you’re freshening up your walls, you can start dreaming about cool home upgrades like these board and batten wall ideas. Fresh walls + new designs = chef’s kiss.

Final Thoughts

Textured walls might be a bit more high-maintenance than other walls, as they’re well worth it when they’re clean and gorgeous. Here are a few simple hacks to clean those walls fresh and get them looking nice again using soapy water to magic erasers without driving yourself nuts (or using all of your paint). Get ready to tackle that grime? Grab your gear and go get ‘me clean.

Happy Cleaning!

White, bright walls can bring your house to life, but you may get a serious headache when it comes to keeping it tidy. Therefore, you need to learn some essential tricks to know how to clean white walls.

White walls in your house can elevate its appearance and look. They allow you to play with different colored accessories and design elements without worrying about the wall’s color.

However, the main challenge with white walls is keeping them clean, which is often harder than it seems. Nonetheless, this comprehensive DIY guide will teach you how to clean white walls quickly and easily.

Before You Start: Know Your Wall and Gather Supplies

Before cleaning, identify your paint type and finish because it determines how gentle or aggressive you can be:

  • Flat/Matte – stains easily, avoid scrubbing.
  • Eggshell/Satin – more washable, can handle light rubbing.
  • Semi-Gloss/Gloss – very durable, safe for most gentle cleaners.

Essential Supplies:

  • Microfiber towel or rag
  • Soft sponge
  • Paper towels
  • Mild dish soap
  • All-purpose cleaner (paint-safe)
  • Baking soda
  • Melamine sponge (Magic Eraser)
  • White vinegar
  • Extendable duster

Safety First:

  • Wear gloves.
  • Keep the room ventilated.
  • Never mix bleach with vinegar or dish soap — it can release toxic gases

Must-Have For A DIY on How To Clean White Walls

Must Have For A DIY White Wall Cleaning

Cleaning walls can be challenging, but white walls are even more difficult to clean and maintain. If you wonder how to clean white painted walls, you must have the right tools and materials to easily shine the white walls and clean your house from top to bottom.

When it comes to essential equipment for cleaning a white wall, you must have a sponge, a microfiber towel or rag, and paper towels. In addition to the above, you may also need an all-purpose cleaner, mild dish soap, baking soda, a melamine sponge (aka magic eraser), and vinegar.

1. Bringing The White Walls Back To Life

Experts suggest cleaning your walls at least twice every month, but the frequency could even be higher with white walls. However, the following are some of the best DIY methods to clean flat white walls in your house.

2. Dusting From The Ceiling Toward The Floor

Dusting From The Ceiling Toward The Floor

Start dusting your walls from the ceiling towards the floor. Ensure your deep cleaning checklist includes an extendable duster or microfiber towel. While cleaning, rinse and wring the towel/ duster in between the wipes to keep it clean.

3. Using An All-Purpose Cleaner

Using An All-Purpose Cleaner

If you don’t know how to clean dirty white walls instantly, an all-purpose cleaner can help. These cleaners have a soap-like texture and work best on sticky stains caused by drinks or food. You can use a microfiber cloth or paper towel to remove the stain.

4. Soft Sponge And Dish Soap

Soft Sponge And Dish Soap

Dish soap can be used on pretty much any surface in your house and can also be used as a wall cleaning solution. However, you must choose a soap with a light fragrance and fewer chemicals. To clean a stain on your white wall, dab a drop of dish soap and use a soft sponge to spume the stain. After a few minutes, clean it using a wet microfiber cloth. You can repeat the process a couple of times on stubborn stains.

5. Baking Soda Paste Method

How To Clean White Walls with Baking Soda Paste Method

Baking soda can work wonders on most types of stains on different surfaces in your house, including white walls. You can make a homemade wall washing solution by mixing three parts of baking soda with one part of water. Once you have a sticky paste, spread it on the wall using a wet sponge and let it sit for about 10 minutes. Once soaked, you can clean the stain with a paper towel or a microfiber cloth. If the stain does not come off or leaves an odor, mix baking soda with vinegar instead of water to make the best wall cleaner at home.

6. Using Melamine Sponge

Using Melamine Sponge on How To Clean White Walls

When all other methods of cleaning your white walls fail, a melamine sponge, also known as a magic eraser, can be a lifesaver. It is easily available in most stores and very affordable. To use a melamine sponge, you only need to wet it and scuff the stain until it comes off. You can apply gentle pressure while scrubbing. Although a melamine sponge is the best way to clean white walls, you have to be cautious when using it on a glossy surface, as it may leave a dull spot.

How To Clean White Walls: Additional Tips and Best DIY Practices

Deep home cleaning is incomplete without clean walls. Therefore, the following tips may help maintain tidy white walls in your house.

  • Spot clean immediately to keep the stain from soaking deep into the wall.
  • Be careful while vacuuming around the white walls, as dirt from the floor can easily get on them.
  • Regularly dust the ceiling fans, as the fans can sprinkle dust on the white wall, which can become sticky over time.
  • If you have children or pets, you should spot-clean your walls more frequently than usual.
  • Using wall cleaners can make your job a lot easier.

We are all well aware of lemon use for edible and cosmetic purposes, but have you ever heard of using lemon oil for wood protection? Lemon oil is a magical cleansing agent for wood owing to its acidic content. Additionally, it also protects wood from moisture and drying up. Hence, a whole package for wood maintenance.

There are tons of wood polishes on the market. Why should you prefer lemon oil over them? Where and how to apply it? How to make the most of it? Don’t worry, I am here to answer all your queries and guide you through the process with bonus tips.

Benefits of lemon oil for wood

Most synthetic finishes in the market are very good for rejuvenating the look of your furniture. But lemon oil is a double-edged sword. It not only regains the look but being an oil also nourishes wood. Here are some key benefits of lemon oil for cleaning wood;

  • Cleans the surface of wood by removing all stains and dirt built up.
  • Polishes all wood furniture to a nice shine with a pleasant fresh aroma of lemons.
  • Penetrates dry wood finishes to replenish lost oils and prevents drying and cracking up
  • Lemon oil does not alter the color of the wood.
  • Pops up the grain on the wood, giving it a beautiful look.
  • Protects wood against moisture

Applications of lemon oil

From making the wooden kitchen cabinets stain-free to polishing the outdoor furniture, you can use lemon oil for a multitude of surfaces and purposes.

Tips to use lemon oil for wood Furniture

A lot of lemon oil products are available out there. So, it becomes difficult sometimes to choose the best lemon oil for wood. Finding the right polishing product and using it the right way is the key to furniture maintenance. Here are some dos and don’ts while using lemon oil for wood furniture;

1. Find the right product

Commercial lemon oils for wood aren’t usually pure because pure lemon oil can damage the underlying finishing and is not thick enough to form a coating film. So, they are paired with additives like polish compounds and wood conditioners. However, avoid using products with wax and solvent ingredients as they can damage wood.

2. Avoid over application

  • Don’t pour the lemon oil directly on the finished wood.
  • Take a small amount on a clean, lint-free cloth and rub it gently on the wooden surface in the direction of the grain. If the cloth dries, apply a little amount again.
  • Allow furniture to dry for 1 to 2 hours before moving or placing anything.

Pro tip: For unfinished wooden surfaces, you can also use pure lemon oil for wood. Pour it directly, let it absorb and wipe away the excess.

3. Reapply frequently

Lemon oil, being thin in consistency it doesn’t dry to a film. So, to preserve wooden beauty and maintain the neat look of your bedroom, you should apply it at least every 3 to 4 months.

4. Don’t mess with antique furniture

Lemon oil isn’t suitable for antiques. Due to its acidic nature, it can remove the older finishing ruining its versatility.

5. Extra protection for outdoor furniture

Outdoor wood furniture loses its shine over the time due to sun exposure. So, you not only need to clean the outdoor furniture but also give extra protection against sunlight. It is recommended to go for lemon oil products having sunscreen and uv inhibitors to maintain its natural beauty.

The bottom line

Lemon oil is a game changing move to preserve the look and shine of your wooden surfaces. Its excellent cleaning nature, obsessing fragrance and extra nourishing prpoperties make it stand out among most of the best wooden polishes in the market. Let your home shine with minimal expenditure!

Frequently Asked Questions

Can I use lemon oil in kitchen?

The use of Lemon oil for wood cabinets and greasy dishwashers is common. However, its use in edibles is limited to flavouring foods and backing. It is important to clarify that food-grade lemon oil is used in cooking and not the lemon essential oil.

Can I make lemon oil for wood at home?

Commercially available lemon oil products are preferable for wood due to added polishing ingredients. However, you can also make it at home by mixing very simple ingredients i.e, 1 part lemon juice, 2 parts vinegar and 2 parts olive oil.

Can I use lemon juice for cleaning stains from wood floor?

No, lemon juice isn’t recommended at all to clean the wooden surfaces ownig to its harsh acidic nature. Instead, try lemon oil for wood floor to get the perfect finishing along with pleasant aroma.

Can lemon oil remove water stains?

Yes,lemon oil is very effective in removing hard water stsains from wood. Due to itscitric acid content, it break calcium and magnesium in hard water and lifts the stains.