Category

Cleaning

Category

A bathroom with unpleasant odours not only feels disgusting but also causes serious health issues. There are tons of tricks to make your bathroom smell good for the entire day, but you need something that is practical, affordable, and effective.

After testing tons of tips to keep my home fresh and clean, I’ve put together a simple list of bathroom hacks that’ll make your space smell just like a spa.

Hacks to Make Your Bathroom Smell Good Using Simple Items

It all starts with deep cleaning a bathroom. Then comes the scents and luxurious upgrades. Let’s look at it in detail.

1. Quick Fixes for Immediate Freshness

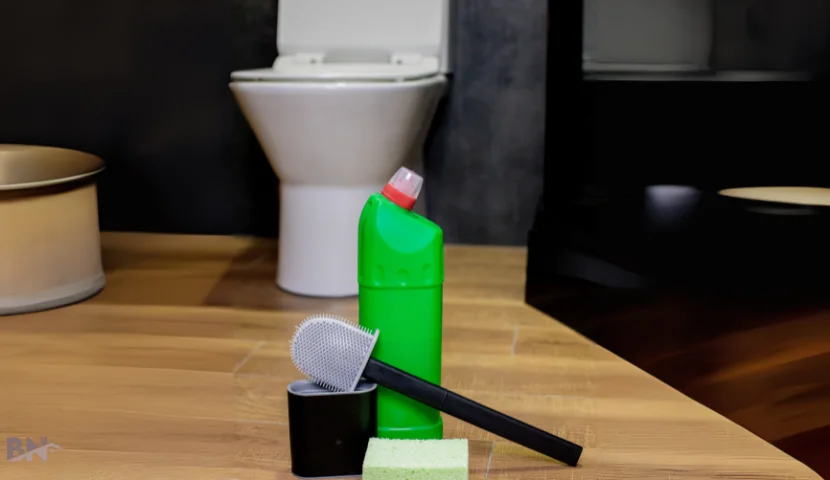
Here are the quick hacks to make the toilet smell good:

  • Essential Oils: Just dab a few drops of spearmint or your favorite essential oil on a cotton ball and toss it in the trash can or behind the toilet. Instant freshness!
  • Soap/Shampoo: Squeeze a little liquid soap or even some shampoo into the toilet while it flushes.
  • Bamboo Charcoal: You can grab a small bag of activated bamboo charcoal and leave it somewhere out of sight (like under the sink).
  • Baking Soda Solution: Baking soda is an old-school reliable. Use it in a corner or sprinkle a bit in the trash can. It starts absorbing odors right away.

2. Deep Cleaning the Bathroom

Target the source of the odour. It can be the sink, trash can, toilet, stained walls, etc.

The following are the practical hacks:

  • Actinobacterial Cleaner: Spray the actinobacterial cleaner generously on the surface of the sink and bathtub. Scrub with a non-abrasive brush or sponge.
  • Enzymatic Cleaner: Use an enzymatic cleaner under the rim and inside the bowl of the toilet. Scrub with a toilet brush and flush.
  • Clean the Taps and Pipes: Faucets might have fungus deposited on them. Wrap them with a cloth soaked in actinobacterial cleaner, wait 20 mins, then wipe with a microfiber cloth.
  • Clean the Floors: Wipe the floors and focus on hard-to-reach corners where mold thrives.
  • Commercial Sprays: If you have textured walls in the bathroom, use commercial sprays, soap mixture, or probiotic cleaner.

Also Read: How to Deep Clean Your Bathroom Sink

3. Ventilation and Air Circulation

Bathrooms are damp and remain closed. You need to get dehumidifiers or exhaust fans to make the space fresh.

Here are some alternative options as well:

  • Leave the door open for half an hour at least after taking a shower.
  • Take the trash out daily to avoid developing odour.
  • Never leave the moist, dirty pile of clothes in the bathroom.

Lastly, the obvious one: Open the windows for free airflow in the bathroom.

4. Scent Enhancers

Your bathroom’s clean and well-ventilated—but that spa vibe? It needs a little extra. Even after scrubbing, subtle odors can linger, so adding gentle scents helps fill the gap and keeps things feeling fresh and luxe.

  • Use odor-neutralizing agents like activated charcoal, baking soda, or essential oils (tea tree, lemongrass, etc.).
  • Place scent enhancers near drains, trash cans, or damp corners.
  • Use scented cleaners (citrus-based sprays) to leave behind a fresh smell after scrubbing surfaces.
  • Scented candles, wax melts, or plug-in diffusers are also a great option.

5. Luxurious Upgrades for a Spa-Like Experience

After completing all the steps, your bathroom needs just the last touch-ups for a hotel-like appearance.

Interior designer Emily Henderson, author of the NY Times bestseller STYLED, once renovated a bathroom by placing mirrors right on the windows. It might sound a little unusual, but it was a smart space-saving trick—combining the vanity, natural light, and mirrors all in one. It made the bathroom dreamy and aesthetic.

If you don’t have that much of a budget, the following are some affordable options to elevate your bathroom look:

  • Invest in Turkish cotton or bamboo towels. Roll them neatly on shelves or in baskets for a hotel vibe.
  • Swap basic mats for a memory foam bath mat.
  • Use flameless LED candles or inexpensive soy candles in calming scents.
  • Add a few drops of eucalyptus, chamomile, or jasmine oil to a diffuser for aromatherapy.
  • Use woven baskets for rolled towels and glass jars for cotton balls or bath salts.

Finally, How to Make a Toilet Smell Good Naturally?

Keep your toilet fresh naturally by sprinkling baking soda in the bowl weekly and adding white vinegar once a month. Place lemon oil-soaked cotton balls or activated charcoal nearby to absorb smells. For a quick refresh, spray a mix of water, vinegar, and tea tree oil around the seat.

Your bathroom sink goes through massive use daily. Therefore, it is super easy for dirt particles, hair, soap residue, and other debris to build up on the sink surface and clog the sink drain. Not only does it make your sink look unappealing, but it also increases the chances of germs spreading infections. Thus, the most reliable method for maintaining your hygiene is a complete top-to-bottom cleaning of the bathroom sink.

In this guide, we’ll have a detailed look at the essentials and steps for cleaning a bathroom sink.

How To Clean Bathroom Sink?

Before cleaning your bathroom sink, you must thoroughly understand what to use to clean bathroom sink and the cleaning procedure. So to make you understand, below are mentioned the details about the essentials and the procedure for sink cleansing.

Essential Tools and Supplies

essential for Sink cleaning products

The supplies you need to clean the bathroom sink differ from those you use when you clean your bathroom floor and roof. The essentials for sink cleaning include:

  • Gloves
  • Microfiber cloth
  • Sponge or scrub brush
  • Bent wire hanger
  • Cleaning detergent (store-bought or homemade)
  • Baking soda and vinegar (optional)

Step By Step Cleaning Process

All bathroom sink cleaning steps you need to follow during a thorough house cleaning are explained below.

1. Wipe Down Your Sink

At the first step, remove the dirt, hair, and any other debris from the sink surface without wetting it. Then, dampen any sponge or cloth with tap water. Clean every part of the sink with it, paying special attention to the faucet and drain.

2. Rinse Your Sink

After wiping down, splash water over the sink to remove any remaining dirt particles. Try to use hot water so that dirt buildup can be easily loosened and cleaned. Rinse all sides of the sink, including the outer and inner parts and areas around the faucet and drain.

3. Spray The Detergent

Select the bathroom detergent depending on the material of your sink. Here’s the type of detergent that can suit you perfectly, depending on your sink material.

Sink MaterialDetergent Type
Ceramic SinkA liquid abrasive or non-abrasive detergent, or an all-purpose detergent.
Porcelain SinkA liquid abrasive or non-abrasive detergent, or an all-purpose detergent.
Metal or Stainless Steel SinkStainless steel detergent or an all-purpose detergent. Avoid abrasive detergent.
Glass SinkA glass or general sink detergent, an all-purpose detergent, or a non-abrasive detergent.

After selecting the suitable detergent, spray it on the entire surface of the sink, also around the faucet, and the drain. Wait for a few minutes so that the detergent settles down and performs its cleaning action efficiently.

4. Rinse Off The Detergent

Using a sponge or cloth that’s slightly wet, make sure no part of the sink’s top goes uncleaned. Apply pressure if you find some dirt buildup or stain there. Avoid using abrasive materials such as a metal scourer, as these materials can result in the loss of surface coating.

5. Sprinkle Baking Soda

If you notice your sink is still dirty, nothing to worry about. The removal of stubborn stains from the sink surface is much easier than removing the stains from the walls. Just take baking soda and sprinkle it on the dry sink surface.

Next, just scrub the sink with your damp cloth. You’ll see the baking soda become a paste. Keep swirling the damp cloth in circles until no stain is left there. Then, rinse the sink with water and dry it. The strong cleaning properties of the baking soda will help remove the stain efficiently.

6. Clean The Sink Drain

You should clean or unclog your sink drain at least once, particularly when deep cleaning your bathroom. Bent wires can be used to remove clogging material, such as soap residues and hair. When it comes to the best way to clean bathroom sink drains, using a solution of baking soda, vinegar, and boiling water to flush them out is recommended.

For this purpose, pour the boiling water into the drain. Now, add one cup of baking soda and then vinegar to the drain. Place a cover over the drain and allow it to react for about 5 to 10 minutes. At the end, again use boiling water to remove any remaining clogged material.

7. Disinfect the Sink Surface

If the sink detergent you used earlier doesn’t contain disinfecting properties, bleach can be a suitable option to disinfect the surfaces. The next step is to prepare the cleaning solution. Add 3ml of bleach per gallon of water and then fill the tank with it. Let it work for around 5 to 6 minutes before draining. Next, wipe all sink surfaces and allow them to air dry completely.

8. Keep The Sink Clean

Rinse the sink after every use. Whenever you wash your hands, remove your makeup, or brush your teeth, pour the water on the entire sink. It will prevent the building of debris or dirt particles and keep your sink clean for a longer period. Moreover, try to disinfect the sink daily to keep it germ-free.

Pro Tips For Cleaning Bathroom Sink

Keep these pro tips in mind to get the efficient cleansing of your bathroom sink.

  • When rinsing the bleach, ensure that no residue of bleach is left behind on the sink surface.
  • Use bleach only on white porcelain sinks. On colored sinks, bleach will damage the color Coating.
  • Don’t mix the bleach with the acidic detergent or any other acidic cleaning solutions.
  • Avoid using bleach that contains sodium hypochlorite in a metal sink to prevent corrosion of the metal surface.
  • Whenever applying the detergent or disinfectant, wait until the solution settles properly to ensure the complete killing of bacteria.
  • Try to buy a detergent that also contains disinfecting properties, so that you can avoid the separate step of disinfecting the sink surface.

Conclusion

Cleaning bathroom sink is a super-easy and quick procedure. Within just 15 to 20 minutes, you can thoroughly clean and disinfect the bathroom sink. All you have to do is select the specific detergent depending on the sink material. Spray, scrub, and rinse the sink surface for a clean finish. If required, unclog the sink drain. Furthermore, develop the habit of rinsing the bathroom sink after every use.

Also Read: The Complete Deep Cleaning Checklist for a Spotless Home

A tidy kitchen is more than simply appearances. It is also necessary for hygiene, food safety and maintaining a healthy and well-cleaned home. Everything we eat affects our overall health. In order to eat healthy, it is mandatory to regularly cleaning the kitchen space for the prevention of food deterioration and maintenance of health.

Kitchen Cleaning Checklist | Step by Step Guide

1. Organizing and Managing Surfaces

You can begin by organizing goods, crockery and every other thing from your cabinets, drawers, shelves and countertops. It will not only eliminate the expired products and those utensils which are of no use anymore, but it will also create more room in order to accommodate stuff. With empty surfaces, you will have space to clean thoroughly without any obstacles.

Sorting Items into Categories:

You can opt for sorting items into these categories:

  • Keep
  • Donate
  • Trash

It clears the area and also sets the stage for reorganizing items later. Furthermore, you might rediscover some forgotten treasures hiding in the back of your shelves!

2. Wiping the Dust off the Cabinets, Drawers, and Other Surfaces

The equipment’s you need for the cleaning of the kitchen space are mentioned below which is the next measure to clean the area

  • Scrub brush
  • All-purpose cleaner
  • Microfiber cloths
  • Bathroom cleaner
  • Degrease
  • Furniture Polish
  • Sanitize
  • Descale
  • Deodorize
  • Dish soap
  • Plastic gloves

Mixture of dish washing soap and lukewarm water can be used for the purpose of cleaning kitchenette spots. Wipe down the surface of your cabinets and drawers, making sure to remove crumbs, grease, dirt or dust that may have accumulated there over the period of time. Fire smoke destroys the paint of the wall, leaves behind the stubborn residue along with lingering odors.

In addition to this, you can also use a brush to brandish over the whole surface. The very next procedure is to do an immaculation of your countertops and backsplash. Use a soft brush or toothbrush to get into the tricky spots such as the gaps between the tiles. If your backsplash is particularly oily, nasty and greasy, a degreaser can make the job convenient.

Make certain to wipe down the handles and knobs of your cabinets and drawers too, as these regions are more prone to accumulate dirt and grime.

Pro Tip:

Use liquid cleaners while wearing plastic gloves to protect your hands.

3: Deep Cleaning of Electrical Appliances:

Giving your electrical devices a thorough clean is essential.

In case of Refrigerator:

Commence with your refrigerator. Take out all the food, unclutter the cabinetry, cupboards, shelves and clean walls, and check for expired things. In case you find mouldy or rotten stuff, toss that in the garbage can and reorganize everything neatly when you’re done cleaning.

In case of Microwave or Oven:

Attempt to clean your microwave or oven, tackling both the inner as well as the outer surface. If you have stubborn grease, marks or baked-on messes, perform scrubbing by applying cleaner prior to it.

Other Appliances:

Do not forget smaller appliances like your toaster, coffee maker, or blender. A quick wipe-down and a thorough cleaning of removable parts will keep them looking and working their best. You are supposed to remove the dirt from the switches and buttons as well.

4: Managing the Sink and Drain Baskets In case of Kitchen Floor

Clean the sink of the kitchenette by scrubbing the basin, faucet, and handles with a gentle abrasive cleaner or baking soda paste in order to get rid of the scrap. Do not forget to clean the drain and any sink accessories, such as a drying rack or garbage disposal. Make sure to dispose of the garbage after the cleaning and also rinse the drain baskets deeply. As all other parts of the house need to be cleaned comprehensively, the cooking area also demands to be kept as hygienic as possible. It is mandatory for the upkeep of the health.

In case of Kitchen Floor

Ultimately, deep cleaning of your kitchen floor. Start by sweeping or vacuuming to pick up crumbs, dust and dirt. Mop with a cleaner and get it into all of the nooks and corners of the kitchen. For those who prefer non-toxic home care, using a natural stain remover for wood floors can be just as effective as chemical cleaners for removing stubborn spills without leaving a sticky residue.

5: Reorganization and Addition of Final Touches

After the cleaning of the pantry, arrange items in your cabinets and drawers, using organizers, tags or labels to keep the things organized and within the range. Organize similar products in the same drawer like baking supplies, cooking utensils, vessels and snacks, all items of the same type in each compartment for easier access.

Bonus Tips:

Pay attention to the other details like cleaning your light fixtures, vents, and any other decorative item such as vintage cooking-related items to make your kitchen more fresh and inviting. Beyond lighting, you can truly transform the heart of your home by exploring creative corner seating designs that turn a simple cooking area into a multifunctional family space.

Why Deep Cleaning Matters:

Maintaining a neat kitchen saves you time and work in the long term. It also helps you to lead a healthier, hygienic and longer life!

Conclusion:

Our scullery also needs to receive the same amount of care and attention regardless of the season. During all kinds of weather whether winter or summer, our kitchenette serves us. It is our duty to duly manage its cleanliness. Happy cleaning!

Cleaning concrete patio pavers can be tough because they receive a lot of foot traffic. Dirt, grime, molds, and algae build up in the corners and gaps of the pavers, making them tricky to clean.

But with the right tools and techniques, you can clean your patio paver in no time. In this piece, we have collected some useful patio cleaning ways suggested by home improvement experts.

Let’s get straight into it!

8 Best Ways to Clean Concrete and Patio Brick Pavers

These are the top most effective ways to clean and redo pavers. You can pick 2-3 different methods, depending on how unclean your patio is.

1) Basics First: Blowing, Sweeping, Wiping, And Soap Water Solution

This one is a no-brainer but worth mentioning because many people skip the basic step and directly jump to picking the expensive tools and cleaners.

Cleaning starts with simple sweeping. If you have loose dirt, debris, grime, dried leaves, or trash thrown on the patio, pick up the broom or leaf blower to clean it. Then, for stains, make simple soap water and scrub the concrete surface. This is also the best way to clean outdoor pavers around the pool.

2) Use Vinegar Or Bleach For More Tough Stains

Vinegar is another most popular option to clean even the hard-to-reach corners of the patio when soap water does not work. Tompkins County Health Department also recommends using white distilled vinegar for general patio cleaning purposes.

Here are the brief steps:

  • Combine equal parts of white vinegar and water.
  • Spray directly onto the affected areas.
  • Scrub the surface and rinse.

However, when using bleach, dilute it first, as it can be harmful to the skin.

3) Do Baking Soda Scrub

Another tip is to use baking soda to clean the pavers from mold and stains. Mix baking soda in water to make a smooth paste. Apply it on the spot and use a soft brush to scrub it. After just around 15 minutes, wash it away with water.

4) Pressure Washer

Many people use the pressure cleaning technique because it is less hectic and extremely gratifying. Just use the right nozzle size and maintain a safe distance. Experts suggest dampening the pavers with soapy water to enhance their cleaning effects.

Ashton Staudacher, a DIY home improvement influencer, cleaned her patio stones with a pressure washing technique. Since she does not prefer chemical cleaning methods, she finds power wash paving stones much more satisfying and easy.

5) Using Paver Cleaning Products

There is a constant debate between people who use power washers and the ones who prefer the best paver cleaners that are chemical-based. Realistically speaking, both ways have their own pros and cons.

If you want to clean pavers without damaging their structure, chemical cleaning is the best. These cleaners will surely remove the algae and moss build-up but might not be effective in cleaning them fully.

A DIY expert used 3 different types of cleaners and pressure wash to clean the pavers and pressure washer to see what options were the best. He concluded that the green tinge of moss was cleaned, but the slabs were not as bright as he expected. So, he had to use the pressure washer later on to clean them fully.

6) Electric Patio Cleaner

Electric patio cleaners are used to deep clean the pavers completely. They are eco-friendly, make less noise, and are extremely easy to use.

  • Set up the cleaning equipment and connect every part carefully.
  • Clear the area and spot the stains.
  • Gently sweep the surface of the patio.

Expert Note: Always let the surface air dry before walking on it to avoid any possible hazards.

7) Use Hydrogen Peroxide

If you do not like to use bleach, hydrogen peroxide is a much safer option. However, ensure that the solution you are making has just 3% concentrated hydrogen peroxide. Apply it on the surface and scrub it after a few minutes. Then rinse and let it dry. You might have to repeat the process if you see no difference.

You can see this in action in a case study where hydrogen peroxide is used to remove the stains of rusty metal chiminea from the patio pavers.

8) Use Sealant At The End

According to the Concrete Masonry & Hardscapes Association, it is extremely important to use sealers to protect the pavement from dirt and grime. From day-to-day spills to strong weather conditions, these sealers help prevent your patio from getting damaged again. Because let’s be honest, you won’t like to do the hard work again after a few weeks of cleaning it from top to bottom. For long-lasting results, ensure that your pavers are installed correctly in the first place. This will ease your cleaning efforts.

Just as proper paver installation makes cleaning easier, understanding how to cultivate a beautiful green lawn ensures your entire outdoor area remains pristine with less ongoing effort.

Finally, How Do You Clean Concrete Pavers?

Next time planning your winter cleaning project of your patio, you should keep in mind the following points:

  • Use less harsh compounds first. For example, soap water, dilute bleach, or vinegar.
  • Sweep loose dirt and grime.
  • Use a pressure washer and other electric patio cleaning tools to deep clean the tough stains.

Remember the last time you were cleaning your refrigerator, shower doors with soap scum, or light fixtures? One thing is for sure – it wasn’t fun.

You’re not alone. One in three people in America overlook these hard-to-reach areas, like the corners and crevices of skirting boards.

Cleaning these spots is tough; dust and grime get trapped deep in tight spaces, clinging to uneven surfaces and edges that typical cleaning tools struggle to reach.

However, with the right know-how, deep cleaning doesn’t have to be challenging. We’ve gathered insights from trusted sources to bring you practical tips for tackling those tricky nooks and crannies during your deep cleaning routine.

Regular maintenance is the key to preserving your property, whether you’re living in a large estate or managing the investment of building a compact home from the ground up.

Tools and Methods for Cleaning Nooks and Crannies

There’s an old saying that:

Fishermen get so accustomed to the sea that they barely notice the scent of salt and fish anymore.

This is similar to your home when it comes to cleaning—whether it’s your precious wooden walls, bedroom, or kitchen appliances or book reading corners, many people focus only on visible surfaces, often overlook hidden empty nooks where dust and grime tend to accumulate.

Once cleared of dust, these spots offer great potential for functional kitchen nook designs that turn overlooked corners into high-value living spaces.

For instance, if you have striking black and white bedroom walls, you might notice dust settling more visibly on the contrasting surfaces, making it essential to pay attention to those hidden corners. However, You would need specialized tools and methods to clean these areas. We cover this in the next section.

1. Plastic Putty knife for Bathroom Soap Scum

nooks and crannies of bathroom sink

This is a straightforward hack if you’re gearing up for a bathroom deep clean. Soap scum often builds up on bathroom surfaces and bathtubs, making it challenging to remove. Most people try scrubbing it away, but this method usually doesn’t work effectively.

I will prefer you to use a plastic putty knife to scrape off the soap scum, ensuring the surfaces are dehydrated before you start for the best results.

For this process, consider using synthetic soaps, which are typically available as liquid or gel soaps. Unlike traditional bar soaps, synthetic options are designed to leave minimal residue, reducing the buildup of tough soap scum on bathroom surfaces.

These soaps are often pH-balanced and gentler on surfaces and skin, making them ideal for keeping your bathroom cleaner longer.

2. Use a Crevice Vacuum for the Hard-to-reach Areas

vacuum cleaner for deep cleaning

This tool is a must-try if you’re serious about achieving a spotless home. The crevice tool is designed to reach tight spaces where a regular vacuum is too bulky to fit.

This tool is invaluable for tackling tricky areas during a deep clean, such as fan blades, air vents, pantry crumbs, between couch cushions, and even the narrow gaps in a small office nook where dust tends to settle behind the desk and cables, as well as those hard-to-reach spots beneath appliances like the refrigerator or oven.

Don’t have a crevice tool for your vacuum? No problem! I got you covered. You can make a DIY version using a paper towel roll, let me demonstrate to you how. Simply attach an empty paper towel tube to the end of your vacuum hose and pinch the tip to reach those tight spaces effectively.

You can then tie it using a rubber band. It won’t be as effective as the former, but it still cleans those trick areas that are hard to reach.

3. Drill Brush for Kitchen Sinks

kitchen sink deep cleaning


If you’re asking how to deep clean your kitchen, this hack works well for kitchen sinks.

The kitchen sink is generally clean, but if you want it genuinely spotless, including the sink drain, I would suggest you use a handy tool—your everyday drill. Follow these steps to make it “cleaning-ready” without risking damage to the sink.

Start by inserting a machine screw into the brush head, ensuring that the screw head fits securely in the brush’s hole.

On the other side, slide a washer onto the screw and fasten it with a nut. Tighten the nut with a wrench, but be cautious not to over-tighten, as this could crack the brush’s plastic. Finally, attach the scrubber head to the drill, and you’re ready to tackle that sink! While you’re at it, don’t forget to wipe down the protective wall surfaces behind your basin, as they often harbor hidden grease and water spots.

Put some detergent or dish soap in warm water. Dip the drill brush into the solution so it can catch some foam. Start the drill and point it on your sink, including the sinkhole.

4. Cleaning Walls with Floor Swiffer

cleaning walls with swiffer

Cleaning walls will be a routine if you have kids around. If it’s not crayon markers, it’s oil stains or soot stains. Removing these stains may require unique cleaning approaches.

But if it’s superficial stains like cobwebs, personally, a floor Swiffer is better. It’s simple: Attach a dry cloth over the rectangular end of the Swiffer, secure it in place, and glide it along the wall to clean it.

The Swiffer’s extension handle allows you to reach high surfaces quickly and safely, eliminating the need for a step stool or ladder. Throw the disposable cloth once you’re finished dusting.

As said earlier, this approach is specifically for cleaning cobwebs and soot. Try using baking soda or an all-purpose cleaner for tough stains on white walls.

5. Garden Gloves for Ornaments and Trinkets

garden gloves to clean nook and crannies of home

You can use a garden glove if you have knickknacks or small dusty ornaments you can’t clean with a household rag.

Many of these areas are small, making reaching into the nooks and crannies challenging. A helpful trick is to use a cotton garden glove. Slip it on, and then use your fingers to dust those tight, hard-to-reach spots quickly.

Dampen a cotton glove with a small antibacterial solution for an effective clean. This added touch will help ensure thorough sanitization.

6. Microfiber Duster for Appliances

microfiber duster for cleaning nooks and crannies

Home appliances gather a lot of dirt, especially behind washers, refrigerators, and dryers.

For a deep clean, a long-handled microfiber duster is excellent for reaching tricky spots on appliances. However, move appliances away from the wall to thoroughly clean behind and around them for the best results.

Clear out any dust bunnies hiding behind them, and wipe down surfaces with warm, soapy water to leave everything fresh and spotless.

Conclusion:

Cleaning nooks and crannies may not be the most enjoyable part of deep cleaning your home, but it doesn’t have to be exhausting with the suitable methods and tools. This article has provided helpful insights to make the process easier for you.

Each square inch of a toilet seat has over 1200 germs on it, but do you know stains and buildup on toilet seats are the classic signs of excessive bacteria and germs on your toilet? While quick cleanings might make your toilet look tidy, they often leave behind hidden bacteria. That’s why we’ve gathered practical toilet cleaning hacks to remove stains and eliminate germs, giving you a fresh and clean toilet.

Identifying What Spoils Your Toilet

The bathroom is a tricky and challenging place to clean. The whole thing can become even more difficult when you have to clean the white walls in your toilet. But what really spoils your toilet and bathroom so much and so quickly?

  • Brown or Rusty-Colored Stains: The iron content present in the water forms iron oxide by coming into contact with the air, which leaves a brown or rusty-colored residue on the toilet seat.
  • Black Stains: Mold and mildew thrive in moist environments and are the ones to blame for the black stains on your toilet surface. Apart from mold and mildew, minerals like manganese, if sitting for too long in the toilet bowl, can also cause black stains.
  • Limescale Deposits: If the water you use in the toilet has too much calcium carbonate in it, it can cause hard and crusty deposits on your toilet in areas that are constantly in contact with water. These deposits can get thicker over time and can be very challenging to clean as they stick to the surface very strongly.
  • Old Corroded Plumbing: The old metal plumbing inside your house can corrode over time lead to residues on the toilet seat and cause black stains. It happens due to the mineral and organic matter present in the water.
  • Hard Water Stains: If you use hard water in the bathroom, then there is a good chance that minerals like calcium, magnesium, calcium chloride, magnesium carbonate, etc. may deposit residues on the toilet, which may appear chalky gray or white. These hard water stains are most noticeable at the upper rim of the bowl and at the areas under the water line.

Cleaning Your Toilet Like A Pro

Cleaning Your Toilet Like A Pro

Mineral deposits and organic matter present in the stains will form a food and breeding ground for the bacteria and germs. Thus, proper cleaning of your toilet becomes quite vital. To make sure that you don’t leave behind any stains or bacteria after cleaning, you must have the following essential cleaning supplies with you.

  • Regular Toilet Brush
  • Scrubbing Brush
  • Stiffer Bristles
  • Vinegar
  • Baking Soda
  • Borax
  • Hydrogen Peroxide

Once you’ve gathered your supplies, you can pick one of the following hacks to get rid of those stubborn stains on your toilet.

Vinegar And Baking Soda

Vinegar and baking soda are cleaning superheroes. They can clean different kinds of surfaces and stains. To clean the toilet seat and lid using vinegar and baking soda, pour two cups of vinegar directly on the stains, scrub it a little, and leave it for an hour. After an hour, sprinkle a cup of baking soda on the stain, pour another cup of vinegar on the soda, leave it for 15 minutes, and then scrub the stain and flush the toilet.

White Vinegar

White vinegar a.k.a. distilled vinegar has a pH value of approx. 2.5, which makes it super acidic and perfectly capable of dissolving the mineral scales. Therefore, you can use white vinegar to clean around the toilet and bowl. Pour 2-3 cups of vinegar directly on the stains or apply a few thin layers of toilet paper soaked in vinegar on the stain. Let it sit for about 2-3 hours, then scrub the toilet and flush; you’ll have a super shiny, stain-free toilet. You can also use this method to clean the toilet tank and get rid of the scales inside.

Vinegar And Borax

When you mix ¼ cup of borax powder with one cup of vinegar and let it sit for about 15-20 minutes, you get a super toilet cleaner that can prevent any kind of stains from your toilet, including hard water mineral deposits. Sprinkle ¼ cup borax powder on stains and pour 1 cup vinegar on it. Leave the surface for about 20 minutes, and then scrub and flush to say goodbye to the dirty toilet. You can also make a paste by mixing borax powder with a few drops of vinegar and applying it to the stains to get rid of those toilet stains.

Baking Soda And Hydrogen Peroxide

The combination of baking soda and hydrogen peroxide act as a cleaning cum disinfecting agent. You can pour half a cup of hydrogen peroxide on toilet stains and sprinkle a cup of baking soda on it. Let the mixture sit for about 15 minutes, and then scrub and flush the toilet, and you’re done. You may bend over backward while cleaning your house from top to bottom, but if you ignore your toilet while doing so, you’re not doing it right. Luckily, the above mentioned toilet cleaning hacks will help you get done with the task without breaking a sweat and have a stain-free toilet.

Winter days are filled with laziness, which makes cleaning and tidying up your house a big challenge. However, one cannot afford to skip cleaning during the winter as it may lead to a buildup of dust, allergens, and mildew in your home. However, this winter cleaning checklist will help you clean your house like a pro in no time and allow you to enjoy the winter in a clean and cozy house.

Stay Warm and Tidy | Your Essential Winter House Cleaning Checklist

1. Clean Your Radiators and Fireplace

Winter can be brutal in some areas, making it impossible to bear the cold without efficient heating. However, your radiator may get clogged with debris and dust over time, which can reduce its performance. However, you can quickly reinstate your radiator’s performance by cleaning it with a microfiber cloth and ensuring that it works efficiently during the winter. The same goes for a fireplace. You have to make sure that it’s clean and safe to use well in advance before the winter starts. Remove debris, ashes, and creosote buildup for better heating during the cold days.

2. Declutter Your Closet

Winter cleaning is incomplete without cleaning your wardrobe. Therefore, make sure you include the same in your house cleaning checklist. Remove the clothes that you don’t need during the winter as it will give you more space in the wardrobe. It’ll also make it more convenient for you to access your winter essentials quickly.

Moreover, cleaning and decluttering your closet will prevent the growth of mold and mildew, saving your clothes and wardrobes from foul, musty odors. Nonetheless, regular winter cleaning would require you to put less effort into fall cleaning.

3. Don’t Forget the Carpets and Rugs

People often ignore carpets and rugs while cleaning. However, you can’t completely clean your house for winter until you deep clean your carpets and rugs. Muddy boots and pet paws can bring dirt and odor to your carpets and rugs. Regularly cleaning your carpets and rugs can help you get rid of dirt and odor. You can also prevent stains from settling in by steam cleaning your carpets and rugs regularly. But it may be difficult to clean carpets on your own. In such cases, you can hire a professional carpet cleaning service for thorough cleaning.

4. Take Care of Your HVAC

Taking care of the HVAC unit must be one of the top priorities of your winter cleaning list. Besides, preparing your HVAC unit in advance for the winter also prevents it from breaking down mid-winter.

Make sure you clean the air ducts and vents once at least every three months to ensure that they are working smoothly. It will also ensure that you get steady airflow and clean air throughout the winter. Cleaning the vents and ducts also helps clear the buildup of allergens and pollutants that may hinder the airflow inside your house and also reduces the risk of coughing and colds.

5. Include Sanitization in Your Cleaning Checklist

From home office to understaired reading nooks, some people spend a lot of time cleaning every corner of their house, yet they often fall sick during the winter. While cleaning can help remove rubbish from around the house, it does not guarantee the removal of germs and bacteria, which can manage to thrive on what seems like a clean surface. Therefore, sanitize handrails, door handles, lift buttons, etc., to make sure that you do not contract any illness caused by bacteria or viruses. Moreover, it is essential to disinfect the floor regularly during the winter to reduce the risk of contagion.

6. Deep Clean Your Kitchen

Ensure that you clean the kitchen thoroughly during the winter cleaning. Dust out the drawers and cabinets to remove allergens that may be trapped inside your kitchen. Since windows are usually closed during the winter, be sure to clean and begrime the hood vents to get rid of cooking odors.

7. Keep Your Windows Clean

Winter days can be gray with limited daylight hours. Besides, the colder temperature outside and warmth inside your house can lead to condensation and moisture accumulation on your window, which can cause stains. Clean your windows to ensure that your home gets ample sunlight even during the winter. Besides, cleaning your windows regularly will create a more inviting ambiance and allow more natural heat in the house.

8. Don’t Ignore the Outdoor Areas

The outdoors needs attention even during winters. If you’ve got a patio or poolside area, give it a quick cleanup too. Moisture in these spots can lead to mold.

Benefits of Winter Cleaning

While cold and dreary weather can have a significant effect on your mood, giving your indoor space a thorough clean can significantly brighten it up. So, make sure to follow the below winter cleaning tips.

  • Prevention of various seasonal illnesses
  • Improved air quality inside the house
  • Better mental health and mood
  • A warm and welcoming environment for you
  • Prevention of mold and mildew buildup
  • Increased efficiency of heating systems
  • Curbs the spread of germs and bacteria
  • A warm, cozy, and clutter-free home

Having stained walls means your home would look untidy even if you have cleaned the entire house multiple times. Wall stains are so noticeable that people want to remove them as soon as possible. Hence, they desperately scroll through endless discussion boards online, asking, How can I remove stains from walls easily? There are tons of methods to clean the wall stains, but you have to choose the one that suits your wall’s condition.

How To Get Marks Off Walls? 5 Easy Wall Cleaning Methods You Need To Know

Wall stains can be caused by various factors, including seepage, grease, dust, and ink. Therefore, different methods are needed to clean them off the walls.

1. How To Remove Water Stains From Walls?

Water stains are the worst when they occur in buildings due to seepage. You can either hide them with paint or find the root issue and fix it first so the stains will not happen again.

After fixing the leakage, use any of the following methods to wipe the stains:

  • Mix equal parts water and vinegar, apply it on the wall, and let it sit for a few minutes. Then, grab a sponge or soft cloth and give it a gentle scrub. Easy fix!
  • Make a baking soda paste (just water + baking soda), spread it on the stain, wait 30 seconds, and then wipe it away.
  • Make some soapy water, dunk a cloth in, and gently rub that bad boy on the wall.

Always Remember!

Try out your cleaning mix on a small spot first to make sure it doesn’t mess up the paint.

2. How To Remove Soot Stains From Walls?

Soot stains are the black, powdery marks that you often find near stoves or fireplaces. They are the carbon particles that accumulate over time and damage the look of the wall.

Start by getting rid of the loose soot with a vacuum or a brush. Then, grab a dry cleaning sponge and wipe away any leftover soot. You can also use soap and water to gently remove the remaining tough stains. Then, grab some clean water and give those walls a good wipe-down.

3. How To Remove Cigarette Stains From Walls?

They don’t just look awful, but they stink too. To clean them off, ventilate the room first. Wear safety goggles and gloves, cover your hair, and start removing the loose debris. Mix dish soap, baking soda, and water to scrub the wall. For stubborn stains, you can use methylated spirits on a cloth.

4. How To Remove Oil Stains From Walls Without Removing Paint?

First things first, use a paper towel or cloth to blot the oil stain gently. Use a few drops of dish soap in a water and spray it on the affected area. Gently scrub it in circular motions, working from the outside of the stain inward to avoid spreading it. This solution is effective for cutting through grease without harming the paint. You can also use distilled white vinegar spray or apply chalk if the marks are light.

Avoid using harsh chemicals like bleach or abrasive cleaners, as they can damage the paint and wall texture.

5. How To Remove Crayon And Marker Stains From Walls?

These are the most prominent and—honestly—very annoying marks to see on the wall, especially on white walls. The best way to combat them is to use a magic eraser. This method is particularly effective on high-gloss finishes but should be used cautiously on flat paint.

Another way is to use Mayonnaise (specifically for crayons) or toothpaste and let it sit for 5 to 10 minutes. Then wipe off with a damp cloth. If there are some pencil colors, you can simply erase them with the regular eraser. Just be careful not to apply too much pressure while trying these tips; otherwise, it will damage the paint.

Clean Tough Stains From Different Types Of Walls

Walls made up of different materials like wood or brick require a little different cleaning methods.

  • For Stain on Oil-Based Painted Walls: Use an all-purpose cleaner, soap, water, and a damp cloth gently.
  • For Stain on Textured Walls: Use mild detergent mixed with warm water and wipe the stain with a soft microfiber cloth.
  • For Stain on Wallpapers: Always use a small quantity of water with a dedicated commercial wallpaper cleaner.
  • For Stain on Wood Walls: Try using baking soda, non-gel toothpaste, or even mix up some olive oil and vinegar.

Conclusion

Removing stains from walls is not that much of a hassle if you know the material and paint of your wall. The most common tip is to use soap, water, or vinegar to do the job. However, if the material is wood or it has oil paint, you have to use other hacks to remove the stains.

A top to bottom clean of your house may require a certain amount of skills. However, things may become much easier if you know specific hacks that can help you clean your home like a pro.

No one likes a messy house, but at the same time, it may not be everyone’s cup of tea to maintain a tidy home all the time. Besides, not everyone knows what should you use to sweep corners and hard to reach areas. However, if you have a deep cleaning checklist, it may become much easier for you to clean your house effectively and maintain it that way for a longer time.

Therefore, we’ve put together this top to bottom clean guide to help you learn how to deep clean a house. With this guide, you’ll be able to clean your house like a pro and have a tidy home.

7 Steps to Deep Cleaning Your Home

Cleaning your house can be time-consuming and tiring if you do not have a proper house cleaning plan. Not only will it help you cut down the time it takes to clean the house, but it will also help you develop a routine for regular house cleaning.

Nonetheless, if you’re wondering how to deep clean a house, you may need to pay special attention to the following areas.

1. Start Cleaning from the Ceilings

The ceiling is an important part of your house but a very challenging one to clean due to its lack of easy access. However, you can use a telescopic duster with feathers or microfiber to remove cobwebs, dust, loose debris, and much more.

You can also use vacuum cleaners for textured ceilings, detergents for mild stains, and vinegar solutions for mildew and mold. You can also use baking soda paste to cover grease stains that will not come off quickly.

2. Working the Walls

To keep your walls neat and shiny, you must dust them at least once or twice a month. You can use a broom, unused paint brush, or dry microfiber. Make sure you dust the walls from the top down.

You can also use a cleaning solution and a sponge to clean your walls. For a heavily soiled area, use baking soda and gently rub the area with a dampened sponge. In addition to the above, make sure you have a step stool or ladder to reach the higher areas of the wall.

3. Keep Windows and Mirrors Shiny and Clean

A top to bottom clean house must have clean windows and mirrors. Neat and clean windows ensure that your home gets ample natural light. However, dust, smudges, fingerprints, etc., can easily stain your window glasses.

Similarly, apart from their functional use, mirrors can also enhance space and light and increase the amount of light inside your house.

This trick is a favorite in cost-effective small house designs, where maximizing every square inch is essential for both comfort and budget. Therefore, it becomes imperative to keep them clean and shiny.

Make sure that you clean windows and mirrors once or twice a month. You can use microfiber cloths and squeegees to clean glass with water or vinegar via a spray bottle. Also, wipe in vertical and horizontal motions instead of circular ones to prevent streaks.

4. Don’t forget the Mattresses and Bedding

Remember to clean your mattresses and bedding while cleaning the house. You can also effortlessly deep clean a mattress at home, and make it fresh as new. First, remove sheets, mattress covers, and pillowcases and wash them in hot water to eliminate odors, stains, and dust mites. To clean the mattress, you may need a vacuum cleaner with upholstery attachments to go over the entire surface.

You may also need a stain remover or enzyme cleaner to get rid of hard-to-remove mattress stains. Moreover, you can put your mattress out in the sun or sprinkle baking soda all over it to keep it free of odors and moisture.

5. Kitchen Corners are Important

Cleaning the kitchen can be a back-breaking job when cleaning your house. You can start by clearing the clutter off your counter, emptying the dishwasher, and dusting the fridge and cabinet tops. Once done, you can clean small appliances, scrub the stove and oven, deep clean the sink, and clear out the fridge.

Droom, sponge, mop sticks, vacuum cleaners, etc., are the essential tools you must have while cleaning the kitchen.

6. Don’t Ignore the Bathroom

Bathrooms are safe havens for mold and mildew and, therefore, require regular cleaning. Once you remove the towels and bathmats, you can vacuum your bathroom from top to bottom to remove dirt and dust. Next, you can shine the glasses, mirrors, faucets, and fixtures with a microfiber cloth using an all-purpose cleaner. If you have mineral deposits on your plumbing fixtures, pour some vinegar on a cloth and wipe the affected area to make them sparkle again.

Once done, you can clean sinks, soap dispensers, countertop items, tubs, and showers using tools like non-abrasive scrubbers and all-purpose cleaners. In the end, you can clean the toilet and bathroom floor.

7. Close with Cleaning the Carpet

While cleaning the floor is easier, cleaning the carpet is not so convenient. However, you must vacuum the carpets at least once a week whereas deep cleaning is must at least twice a year. But

Deep Cleaning Carpet at Home

To deep clean a carpet, spray a mixture of three parts cold water and one part distilled white vinegar on the carpet, let it soak, and blot away the solution to clean it.

Alternatively, you can also use a mixture of salt and baking soda, sprinkle it on the carpet, and spray it with water, followed by scrubbing and wiping with an old towel. You can also use steam to dampen the carpet and then use a microfiber cloth or towel to clean it.

House Cleaning Checklist – Important Things to Consider While Deep Cleansing

By far, you may be well aware of the important parts of the house that you need to clean to ensure that your entire house is neat and shiny. However, the following tips may help you easily complete the cumbersome task.

  • Always clean your ceiling and fixtures first, followed by walls and windows, furniture and shelves, counters and appliances, and then baseboards and floors.
  • Before you start cleaning, declutter every room and organize the entire house. Keeping everything in its place will help make the process faster.
  • Gather all the supplies beforehand so that you can save time while cleaning the house. If you’ve got an outdoor area with a pool, don’t forget the patio; cleaning poolside pavers helps keep the space mold-free and tidy.
  • Make sure to use disinfectant for surface areas and countertops.
  • Always sweep first, then mop.

Make a habit of regularly washing your cleaning tools to ensure they work effectively.